How To Replace Subaru Liftgate Supports
OEM Liftgate supports should last for years. But when your liftgate starts sagging, it’s time for a new set. Most car owners don’t think it’s a task they can tackle themselves, but it’s a lot easier than you might think.
This article will explain how to replace your Subaru hatch lift supports step-by-step, saving you the hassle and cost of getting a dealer or specialist to do it for you.
Tools For The Job
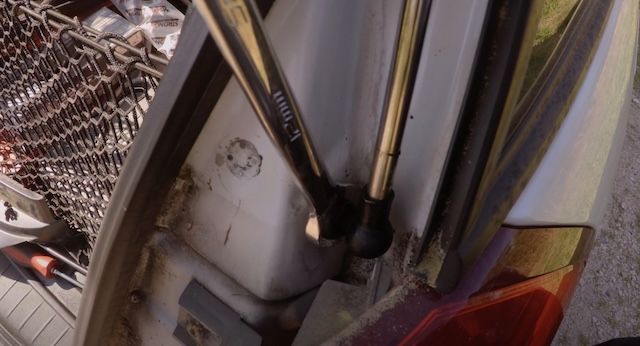
Image Credit: MrSubaru1387
There’s no need to go out and buy expensive tools for this job. Just about every household already has these items at hand:
- Socket set and extension piece (to remove liftgate supports – 10mm socket the most common)
- Flathead screwdriver (to pry off metal liftgate support cover)
- Broom handle or long stick (to hold the liftgate up)
Removing The Liftgate Support
The instructions below apply to most Subaru models. Some models have plastic trim pieces covering the strut's lower section. Models fitted with electronic liftgates may have a wiring harness that needs to be unclipped first.
Aside from that, the basic design and location of most Subaru hatch lift supports are very similar.
- Open the liftgate and wedge it open with a broom/stick or any suitable item that you have available.
- Remove the bolts holding the bottom section of the liftgate support to the vehicle frame. Some models may have a plastic trim piece covering this part. If so, remove the screws holding it in place and use the flathead screwdriver to gently pry it off.
- Now, use a wrench to loosen the ball pivot on the liftgate frame. You may need a screwdriver to help pop the support out. You should now be able to remove the old liftgate support. If your vehicle has an electronic liftgate, you may also need to unclip the wiring harness.
- Unscrew the ball pivot from the liftgate frame.
Installing The New Liftgate Support
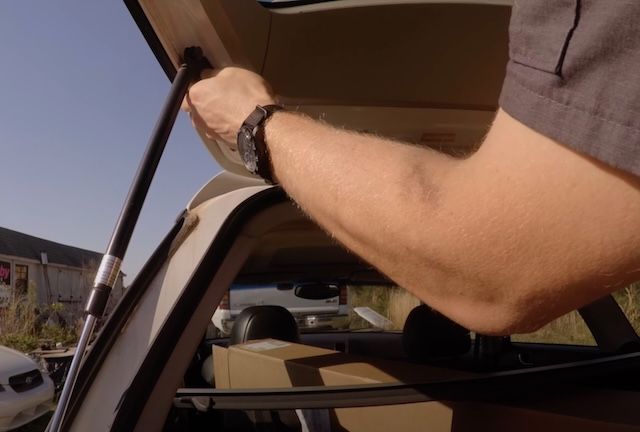
Image Credit: MrSubaru1387
If you are using an OEM-spec replacement liftgate support, it will be the exact size of the original. This is very important because the liftgate and bodywork can easily be damaged if you fit an ‘almost the same’ aftermarket part.
Each OEM support is designed to work on either the left or right side of the liftgate. Check for the letter L or R on each support before fitting it to the car.
- Attach the new liftgate support to the frame first. Screw in the bolts by hand to ensure it aligns correctly, then tighten with your wrench.
- Your OEM-spec replacement liftgate support comes with a new ball pivot. Fit this part first onto the liftgate frame. A 12mm wrench or socket wrench is the most common tool here.
- You can now snap the top section of the support onto the ball pivot.
- If your vehicle has a plastic cover, then clip it back into place. If it has a wiring harness, plug it back in as well.
- Remove the support (broom or stick) and gently close the liftgate.
The entire replacement process should take about ten minutes per side.
A Tip For Electronic Liftgates - If you find you have an electronic liftgate that won’t respond to the press of the key fob button, try the following:
- Manually lower the liftgate gently until you hear the first click. Let the motor pull it shut. This should reset the liftgate, and it should work with the key fob again.
OEM Liftgate Supports From Subaru Parts Plus
A worn-out Subaru liftgate support is easy to replace. Doing it yourself will save you time and money - as will buying the OEM replacement supports at wholesale prices from Subaru Parts Plus.
We have been supplying quality OEM Subaru parts since 2005. Every part we sell comes with Subaru's manufacturer warranty. We stock complete OEM manual and powered liftgates, as well as an extensive selection of liftgate supports and related parts.
Our staff are passionate enthusiasts who know every part of your Subaru. Contact our team online or give us a call at 1-888-294-4979 and order your OEM Subaru liftgate support today.